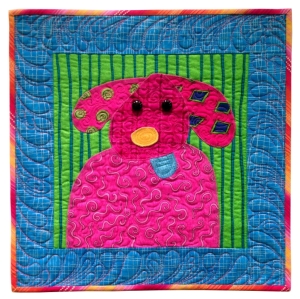
 Here’s the first quilt created in the “Old Dogs, New Tricks” series. Pretty basic stuff. I’m just getting my feet wet. I added a blue border and bound it with a 1/4″ binding. It measures about 14″ square.
New Tricks
1. Believe it or not, I don’t ever recall making a bias binding using striped fabric with the stripes at an angle. I love striped binding, but I usually run the stripes perpendicular to the edge of the quilt. So, I figured if I couldn’t remember doing a bias stripe binding with the stripes at a 45 degree angle, it was about time I did it again. Or for the first time. Amazing how much more waste there is cutting bias strips. I do like the way the hot pink binding pulses around the quilt.
2. I wanted to see if I could stop quilting exactly 1/4″ from the edge of the quilt, so that the binding would touch the last stitch but not go beyond it. Not sure why that was a goal, but it’s not a very good one. I would have done better to sew off the quilt like I usually do. (I was “off” in as many places as I was “on.”) Discovering what doesn’t work is also learning.
3. I rarely quilt along a color change in a piece of fabric, but I knew I had to try with the blue on green stripe in the background. In the picture below you can see where my quilting strategy left a bit to be desired, but you can see I did OK quilting right next to the line in the border fabric. (Click the picture to enlarge it.)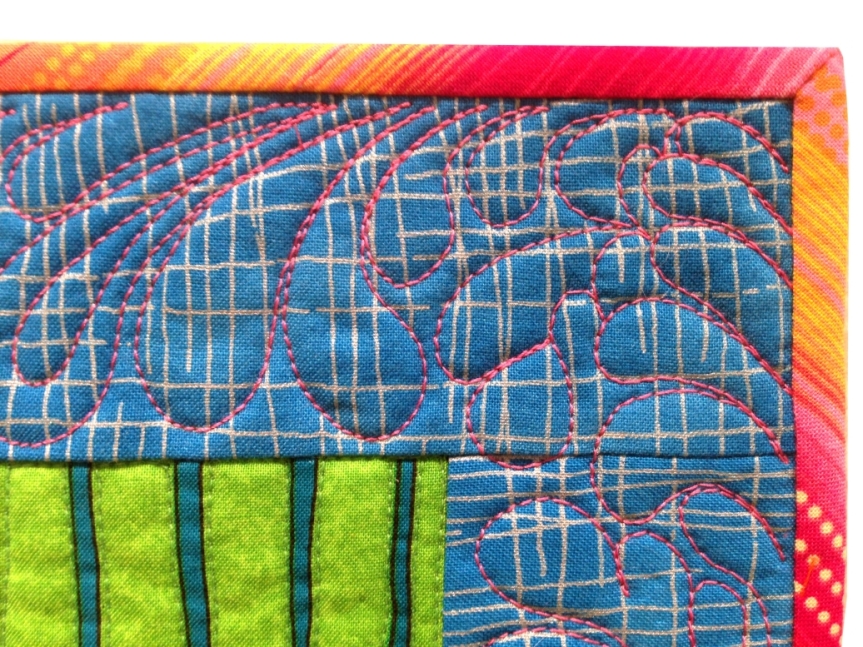
Old Tricks
I’ll be including these also. What’s old to me might be new to you.
1. I pay special attention when I join binding strips (both to grow the binding long enough to fit all the way around the quilt, and where I join the two tails). I try to camouflage the joins by putting the seam in the same stripe or color on both pieces of fabric.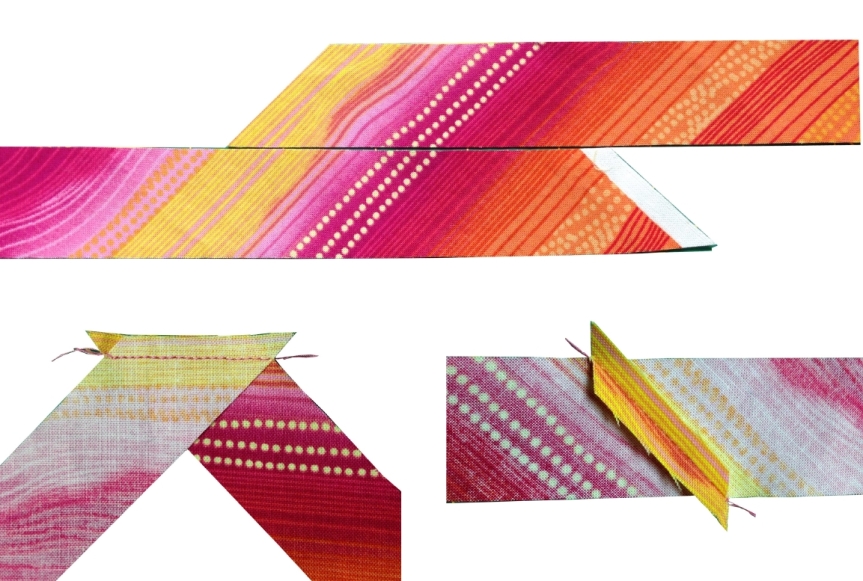
Below is the final join, sewing the two tails together. I leave about 6 or 8 inches un-sewn and fold one tail up and the other down to form the miter. The ruler helps me make sure that the folds are really at 45 degree angles.
I fold and re-fold, moving the folds in the tails along until I get to a place in the fabric in both pieces that is the same color.
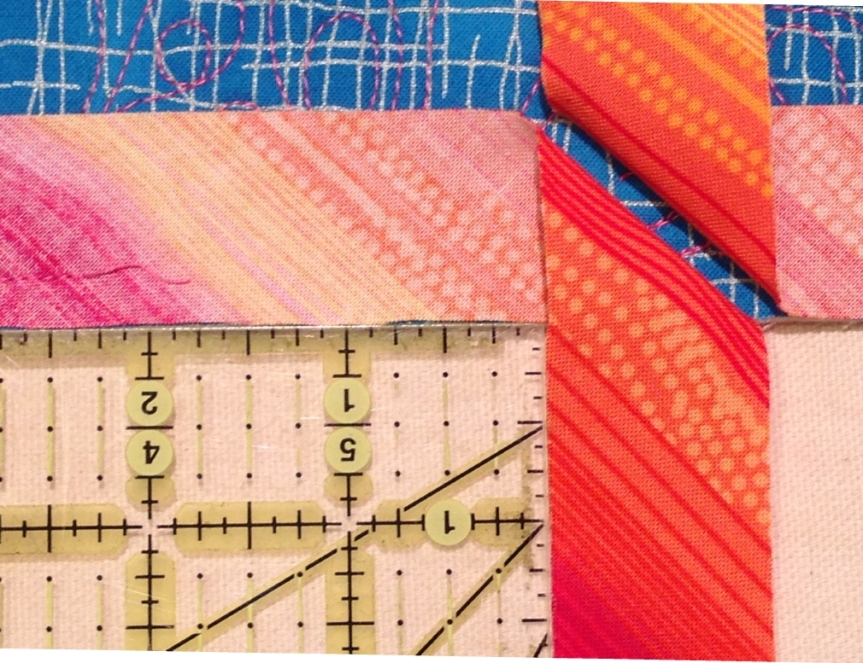
When I’m satisfied, I bring the folds almost touching and hit them with the iron. 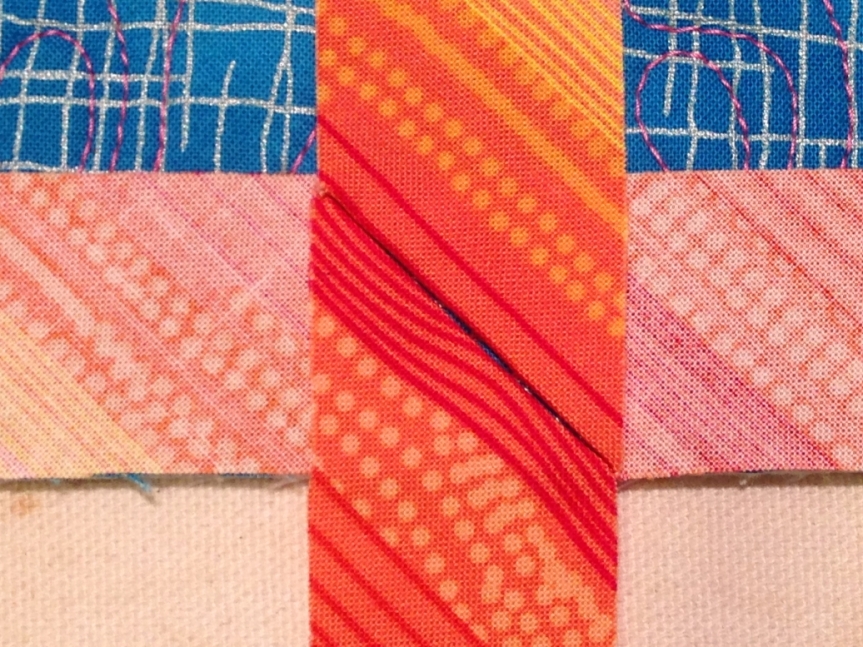
(The weight of the iron compresses the folds so they do touch.) Then, I mark a line in the valley of each crease (sewing line) and another line 1/4″ away toward the end of each tail (cutting line).
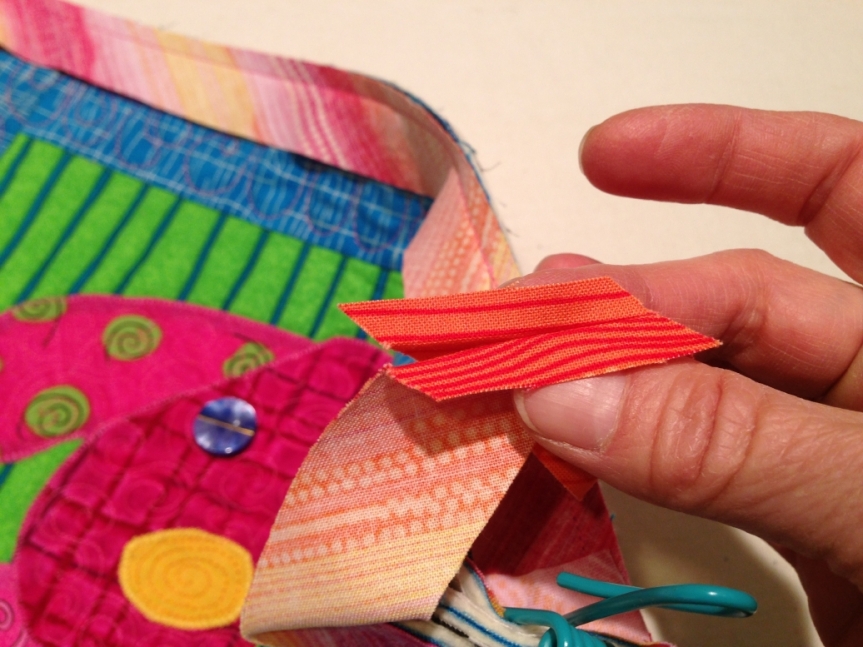
Then I pin the ends…
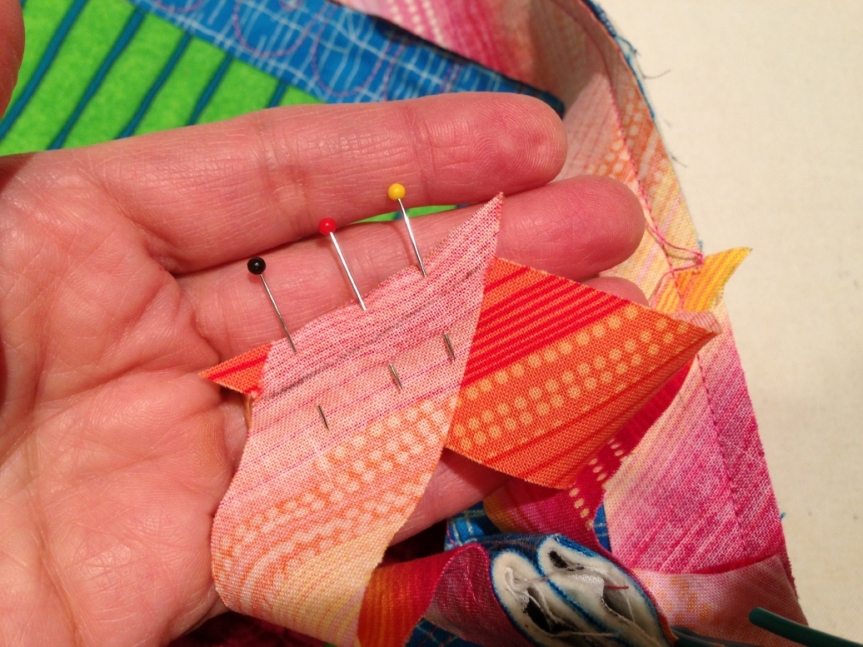
… and stitch on the marked line that was in the crease.
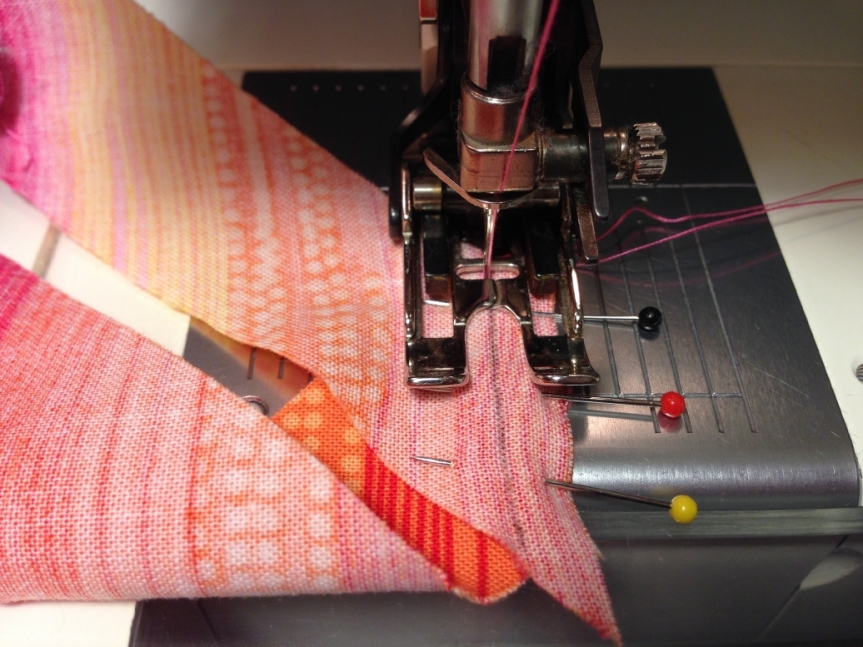
I know there are other ways to do this, but I like the control of positioning the seam exactly where I want it with regards to the color in the striped fabric.
By the way, when I make cross-grain binding (not bias) I butt my joins. It’s much easier to camouflage the seams when they are not at an angle. I don’t mind the extra bulk and I’ll tell you why in a future post. (I’m running out of room!)
2. All my Old Dogs will be wearing buttons for eyes. Buttons with shanks look more like eyes, but after you sew them they tend to flop around quite a bit. So, I don’t sew them. I safety-pin them on.
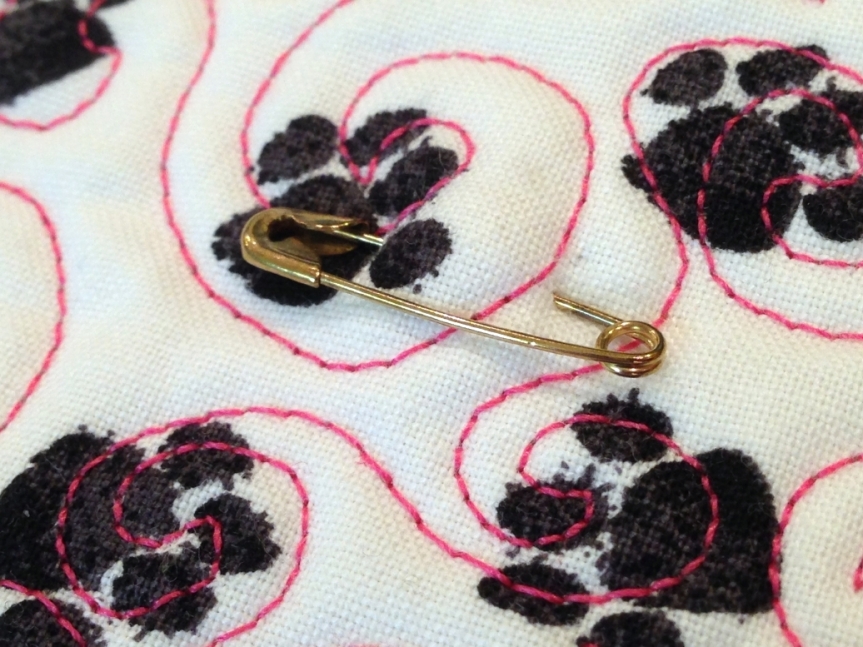
The safety pin draws the shank into the quilt so it won’t wobble. And I get the added benefit of changing my mind and swapping out one set of buttons for another, or just repositioning the eyeballs.

Looks like fun. I have an old dog, and would love to make this pattern and practice quilting . Is there a pattern? Thanks
LikeLike
No pattern….but if enough are interested…..
LikeLike
Back to your #1………..You do know you can buy fabric which is printed diagonally , thereby giving you the effect of “bias”. I have kept my eye out for years for this type, and usually find a variety to satisfy my “color” needs. I love how it looks and it does so dress up any quilt, especially a colorful one. Can’t wait to hear why you butt your joints when you cut your binding on the grain of fabric, I have always done the joining on the slant, like you did here and think it is so much easier to work with. quiltingly yours, anita
LikeLiked by 1 person
Yup, I’ve seen that fabric too and have used it. Not all that plentiful. I look for the pattern (color, scale, design) before I see which way it was printed. It IS easier to work with in some ways, but not all ways.
LikeLike
Cute block, Ami! Thanks for the info. Curious what you will say about the bulk in the binding…interesting! Love your blog!
LikeLike
Thanks! Stay tuned.
LikeLike
Cute quilt! Can’t wait to hear about the bulk with no joining strips at an angle. I was always told that you had to join at an angle.
LikeLike
Be careful. Few things in life are absolutes. In quilting, you get to make your own path. I’m just sharing mine, that’s all. You get to decide if it’s right for you.
LikeLike
CLICK THE PICTURE TO ENLARGE IT….You are so brave! I would never let anyone enlarge my quilting!! HA!
LikeLike
If I don’t let you enlarge how can you see? It’s all part of the service here at AmiHasNoShame.com
LikeLike
Now I know what to do with all my buttons that have shanks. Thanks.
LikeLike
Faster AND better. Win-win.
LikeLike
I really like your tip about joining the bindings at the end. Thanks for sharing!
LikeLike
You’re very welcome!
LikeLike
I do the( sort of) same for my binding.
Just thought I’d jump in here and answer Vicki’s question about the bulk. There is less bulk when you sew a diagonal seam on the binding as the seam is in 2 different places when the binding is folded. On a straight seam you get 2 seams fold over 2 more seams all in one spot so much more bulk using the straight seam. The sew around and then fold over the end will give more bulk that the seam sewn on the diagonal.
LikeLike
True, but sometimes it’s just not worth the trouble to do a diagonal join. More is coming….really.
LikeLike
Would love a pattern!
LikeLike
I’ll keep that in mind…. thanks.
LikeLike
I tried your method for matching the pattern today and I think I’ve found an easier way. Lay out one piece. Fold the end of the second piece over so that end meets side (the way you would make a square from a rectangular piece of paper). Hit the fold with the iron. Lay the folded end of the second piece over the first piece so that the pattern matches. Carefully reach under and hold the flap of the fold down against the bottom piece. Unfold the top piece and pin. Stitch on the fold line.
Really enjoyed your talk at Fairfield Glade.
LikeLike
You lost me at the bakery, but if it works better for you, that’s great!
LikeLike